I'm restoring my fiancée's bicycle. The hub and spokes are ok, but the bottom of the rims once sat in a puddle until they rusted out. Luckily I had a spare pair of rims left over from my last bicycle project.
It's fairly easy to de-lace a wheel. But getting the lacing right when you put the new rims on looks really hard! All those criss-crossings and spokes going alternating ways... Who can keep track of it? And if you miss a spoke, you'll throw off the whole process. I found websites which provide wheel lacing patterns, but I've got a much easier way than lacing from scratch.
The basic idea is that you only transfer one lace at a time. You copy the pattern from the old wheel step by step, and you'll never miss a spoke.
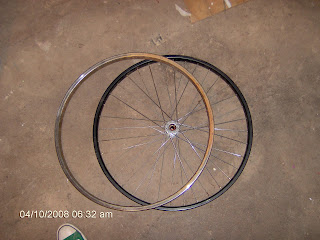
Start by holding the two wheels side-by-side between your knees. Make sure the right side spoke holes in one wheel are next to the right side holes in the other, and the left are by the left. As seen in this picture, the valve holes might not line up although the left-right spoke holes do.
With a flat head bit, completely unscrew a left side nipple.
Move the spoke over to the other rim and screw it in loosely.
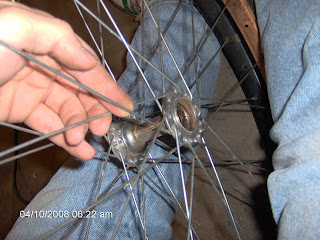
Spokes which cross underneath are blocked by the ones on top. Always transfer the spoke that crosses on top first, then transfer the one that crossed under it.
As you go around transfering each left side spoke, loosen but do not remove each right side nipple.
Save any extra nipples you can get off other wheels, because you will most likely round off a few nipples during the transfer, and you'll need to replace them.
When you've transferred all the left side spokes, you will end up with this. If you welded these rims together, you could make a monster "dualie" mountain bike!
Now work around the wheel and transfer the remaining right side spokes one by one. Except this time, transfer the one that crosses under first, so it will reach, then do the one that crossed over.
Ta-da! Now the old rim is free, and the spokes are all in the new rim. Yet you never undid more than one spoke at a time. Magic!
Don't try to ride it yet! You still need to true the wheel. I'll explain in another post the technique I came up with to true my wheels without special equipment.


2 comments:
Dennis,
This is really clever. I've done it the hard way at least twice, but never again.
One question: do you think this could work with deep-v profile rims, or would you have to bend the spokes too much?
Hard to say because I haven't seen a deep-V wheel in person. From the pictures I've seen, I can't even figure out how you reach the spoke nipples!
As long as the spoke you're moving only crosses over and not under other spokes, then it should only bend at the hub. In all my wheels the spoke is semi-free there. It might bend a little at the neck but I wouldn't anticipate a problem.
One thing that might help would be to go around the whole wheel and loosen all the nipples before you start the process. That will allow the hub to float between the wheels and cut in half the lateral angle the spokes have to take to reach the new rim.
Post a Comment